In a previous blogpost, we presented to you elk - an extension to Ent enabling you to generate a fully-working Go CRUD HTTP API from your schema. In the today's post I'd like to introduce to you a shiny new feature that recently made it into elk: a fully compliant OpenAPI Specification (OAS) generator.
OAS (formerly known as Swagger Specification) is a technical specification defining a standard, language-agnostic interface description for REST APIs. This allows both humans and automated tools to understand the described service without the actual source code or additional documentation. Combined with the Swagger Tooling you can generate both server and client boilerplate code for more than 20 languages, just by passing in the OAS file.
Getting Started
The first step is to add the elk package to your project:
go get github.com/masseelch/elk@latest
elk uses the Ent Extension API to integrate with Ent’s code-generation. This requires that we use the entc (ent codegen) package as described here to generate code for our project. Follow the next two steps to enable it and to configure Ent to work with the elk extension:
1. Create a new Go file named ent/entc.go and paste the following content:
// +build ignore

package main

import (
    "log"

    "entgo.io/ent/entc"
    "entgo.io/ent/entc/gen"
    "github.com/masseelch/elk"
)

func main() {
    ex, err := elk.NewExtension(
        elk.GenerateSpec("openapi.json"),
    )
    if err != nil {
        log.Fatalf("creating elk extension: %v", err)
    }
    err = entc.Generate("./schema", &gen.Config{}, entc.Extensions(ex))
    if err != nil {
        log.Fatalf("running ent codegen: %v", err)
    }
}
2. Edit the ent/generate.go file to execute the ent/entc.go file:
package ent

//go:generate go run -mod=mod entc.go
With these steps complete, all is set up for generating an OAS file from your schema! If you are new to Ent and want to learn more about it, how to connect to different types of databases, run migrations or work with entities, then head over to the Setup Tutorial.
Generate an OAS file
The first step on our way to the OAS file is to create an Ent schema graph:
go run -mod=mod entgo.io/ent/cmd/ent new Fridge Compartment Item
To demonstrate elk's OAS generation capabilities, we will build together an example application. Suppose I have multiple fridges with multiple compartments, and my significant-other and I want to know its contents at all times. To supply ourselves with this incredibly useful information we will create a Go server with a RESTful API. To ease the creation of client applications that can communicate with our server, we will create an OpenAPI Specification file describing its API. Once we have that, we can build a frontend to manage fridges and contents in a language of our choice by using the Swagger Codegen! You can find an example that uses docker to generate a client here.
Let's create our schema:
package schema

import (
    "entgo.io/ent"
    "entgo.io/ent/schema/edge"
    "entgo.io/ent/schema/field"
)

// Fridge holds the schema definition for the Fridge entity.
type Fridge struct {
    ent.Schema
}

// Fields of the Fridge.
func (Fridge) Fields() []ent.Field {
    return []ent.Field{
        field.String("title"),
    }
}

// Edges of the Fridge.
func (Fridge) Edges() []ent.Edge {
    return []ent.Edge{
        edge.To("compartments", Compartment.Type),
    }
}
package schema

import (
    "entgo.io/ent"
    "entgo.io/ent/schema/edge"
    "entgo.io/ent/schema/field"
)

// Compartment holds the schema definition for the Compartment entity.
type Compartment struct {
    ent.Schema
}

// Fields of the Compartment.
func (Compartment) Fields() []ent.Field {
    return []ent.Field{
        field.String("name"),
    }
}

// Edges of the Compartment.
func (Compartment) Edges() []ent.Edge {
    return []ent.Edge{
        edge.From("fridge", Fridge.Type).
            Ref("compartments").
            Unique(),
        edge.To("contents", Item.Type),
    }
}
package schema

import (
    "entgo.io/ent"
    "entgo.io/ent/schema/edge"
    "entgo.io/ent/schema/field"
)

// Item holds the schema definition for the Item entity.
type Item struct {
    ent.Schema
}

// Fields of the Item.
func (Item) Fields() []ent.Field {
    return []ent.Field{
        field.String("name"),
    }
}

// Edges of the Item.
func (Item) Edges() []ent.Edge {
    return []ent.Edge{
        edge.From("compartment", Compartment.Type).
            Ref("contents").
            Unique(),
    }
}
Now, let's generate the Ent code and the OAS file.
go generate ./...
In addition to the files Ent normally generates, another file named openapi.json has been created. Copy its contents and paste them into the Swagger Editor. You should see three groups: Compartment, Item and Fridge.
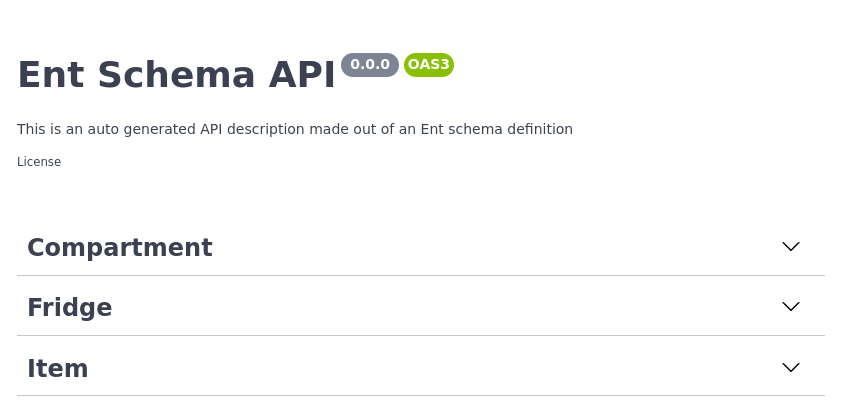
Swagger Editor Example
If you happen to open up the POST operation tab in the Fridge group, you see a description of the expected request data and all the possible responses. Great!

POST operation on Fridge
Basic Configuration
The description of our API does not yet reflect what it does, let's change that! elk provides easy-to-use configuration builders to manipulate the generated OAS file. Open up ent/entc.go and pass in the updated title and description of our Fridge API:
//go:build ignore
// +build ignore

package main

import (
    "log"

    "entgo.io/ent/entc"
    "entgo.io/ent/entc/gen"
    "github.com/masseelch/elk"
)

func main() {
    ex, err := elk.NewExtension(
        elk.GenerateSpec(
            "openapi.json",
            // It is a Content-Management-System ...
            elk.SpecTitle("Fridge CMS"),
            // You can use CommonMark syntax (https://commonmark.org/).
            elk.SpecDescription("API to manage fridges and their cooled contents. **ICY!**"),
            elk.SpecVersion("0.0.1"),
        ),
    )
    if err != nil {
        log.Fatalf("creating elk extension: %v", err)
    }
    err = entc.Generate("./schema", &gen.Config{}, entc.Extensions(ex))
    if err != nil {
        log.Fatalf("running ent codegen: %v", err)
    }
}
Rerunning the code generator will create an updated OAS file you can copy-paste into the Swagger Editor.
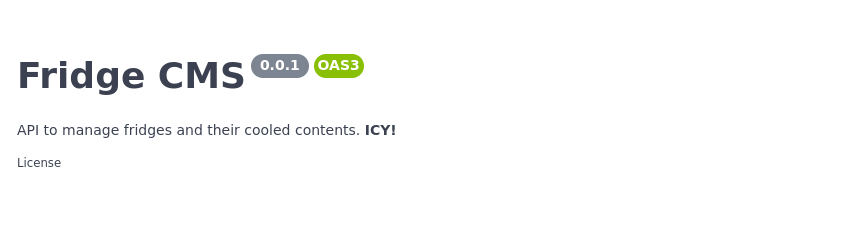
Updated API Info
Operation configuration
We do not want to expose endpoints to delete a fridge (seriously, who would ever want that?!). Fortunately, elk lets us configure what endpoints to generate and which to ignore. elks default policy is to expose all routes. You can either change this behaviour to not expose any route but those explicitly asked for, or you can just tell elk to exclude the DELETE operation on the Fridge by using an elk.SchemaAnnotation:
// Annotations of the Fridge.
func (Fridge) Annotations() []schema.Annotation {
    return []schema.Annotation{
        elk.DeletePolicy(elk.Exclude),
    }
}
And voilà! the DELETE operation is gone.

DELETE operation is gone
For more information about how elk's policies work and what you can do with it, have a look at the godoc.
Extend specification
The one thing I should be interested the most in this example is the current contents of a fridge. You can customize the generated OAS to any extend you like by using Hooks. However, this would exceed the scope of this post. An example of how to add an endpoint fridges/{id}/contents to the generated OAS file can be found here.
Generating an OAS-implementing server
I promised you in the beginning we'd create a server behaving as described in the OAS. elk makes this easy, all you have to do is call elk.GenerateHandlers() when you configure the extension:
[...]
func main() {
    ex, err := elk.NewExtension(
        elk.GenerateSpec(
            [...]
        ),
+       elk.GenerateHandlers(),
    )
    [...]
}
Next, re-run code generation:
go generate ./...
Observe, that a new directory named ent/http was created.
» tree ent/http
ent/http
├── create.go
├── delete.go
├── easyjson.go
├── handler.go
├── list.go
├── read.go
├── relations.go
├── request.go
├── response.go
└── update.go

0 directories, 10 files
You can spin-up the generated server with this very simple main.go:
package main

import (
    "context"
    "log"
    "net/http"

    "<your-project>/ent"
    elk "<your-project>/ent/http"

    _ "github.com/mattn/go-sqlite3"
    "go.uber.org/zap"
)

func main() {
    // Create the ent client.
    c, err := ent.Open("sqlite3", "file:ent?mode=memory&cache=shared&_fk=1")
    if err != nil {
        log.Fatalf("failed opening connection to sqlite: %v", err)
    }
    defer c.Close()
    // Run the auto migration tool.
    if err := c.Schema.Create(context.Background()); err != nil {
        log.Fatalf("failed creating schema resources: %v", err)
    }
    // Start listen to incoming requests.
    if err := http.ListenAndServe(":8080", elk.NewHandler(c, zap.NewExample())); err != nil {
        log.Fatal(err)
    }
}
go run -mod=mod main.go
Our Fridge API server is up and running. With the generated OAS file and the Swagger Tooling you can now generate a client stub in any supported language and forget about writing a RESTful client ever ever again.
Wrapping Up
In this post we introduced a new feature of elk - automatic OpenAPI Specification generation. This feature connects between Ent's code-generation capabilities and OpenAPI/Swagger's rich tooling ecosystem.
Have questions? Need help with getting started? Feel free to join our Discord server or Slack channel.
- Subscribe to our Newsletter
- Follow us on Twitter
- Join us on #ent on the Gophers Slack
- Join us on the Ent Discord Server