
Ent is an open-source entity framework for Go. It is similar to more traditional ORMs, but has a few distinct features that have made it very popular in the Go community. Ent was first open-sourced by Ariel in 2019, when he was working at Facebook. Ent grew from the pains of managing the development of applications with very large and complex data models and ran successfully inside Facebook for a year before open-sourcing it. After graduating from Facebook Open Source, Ent joined the Linux Foundation in September 2021.
This tutorial is intended for Ent and Go novices who want to start by building a simple project: a very minimal content management system.
Over the last few years, Ent has become one of the fastest growing ORMs in Go:

Source: @ossinsight_bot on Twitter, November 2022
Some of Ent's most cited features are:
A type-safe Go API for working with your database. Forget about using
interface{}or reflection to work with your database. Use pure Go that your editor understands and your compiler enforces.
Model your data in graph semantics - Ent uses graph semantics to model your application's data. This makes it very easy to traverse complex datasets in a simple API.
Let’s say we want to get all users that are in groups that are about dogs. Here are two ways to write something like this with Ent:
// Start traversing from the topic.
client.Topic.Query().
    Where(topic.Name("dogs")).
    QueryGroups().
    QueryUsers().
    All(ctx)

// OR: Start traversing from the users and filter.
client.User.Query().
    Where(
        user.HasGroupsWith(
            group.HasTopicsWith(
                topic.Name("dogs"),
            ),
        ),
    ).
    All(ctx)
- Automatically generate servers - whether you need GraphQL, gRPC or an OpenAPI compliant API layer, Ent can generate the necessary code you need to create a performant server on top of your database. Ent will generate both the third-party schemas (GraphQL types, Protobuf messages, etc.) and optimized code for the repetitive tasks for reading and writing from the database.
- Bundled with Atlas - Ent is built with a rich integration with Atlas, a robust schema management tool with many advanced capabilities. Atlas can automatically plan schema migrations for you as well as verify them in CI or deploy them to production for you. (Full disclosure: Ariel and I are the creators and maintainers)
Prerequisites
You can find of the code shown in this tutorial in this repo.
Step 1: Setting up the database schema
You can find the code described in this step in this commit.
Let's start by initializing our project using go mod init:
go mod init github.com/rotemtam/ent-blog-example
Go confirms our new module was created:
go: creating new go.mod: module github.com/rotemtam/ent-blog-example
The first thing we will handle in our demo project will be to setup our database. We create our application data model using Ent. Let's fetch it using go get:
go get -u entgo.io/ent@master
Once installed, we can use the Ent CLI to initialize the models for the two types of entities we will be dealing with in this tutorial: the User and the Post.
go run -mod=mod entgo.io/ent/cmd/ent new User Post
Notice that a few files are created:
.
`-- ent
    |-- generate.go
    `-- schema
        |-- post.go
        `-- user.go

2 directories, 3 files
Ent created the basic structure for our project:
generate.go- we will see in a bit how this file is used to invoke Ent's code-generation engine.- The
schemadirectory, with a bareent.Schemafor each of the entities we requested.
Let's continue by defining the schema for our entities. This is the schema definition for User:
// Fields of the User.
func (User) Fields() []ent.Field {
   return []ent.Field{
      field.String("name"),
      field.String("email").
            Unique(),
      field.Time("created_at").
            Default(time.Now),
   }
}

// Edges of the User.
func (User) Edges() []ent.Edge {
   return []ent.Edge{
      edge.To("posts", Post.Type),
   }
}
Observe that we defined three fields, name, email and created_at (which takes the default value of time.Now()).
Since we expect emails to be unique in our system we added that constraint on the email field. In addition, we
defined an edge named posts to the Post type. Edges are used in Ent to define relationships between entities.
When working with a relational database, edges are translated into foreign keys and association tables.
// Post holds the schema definition for the Post entity.
type Post struct {
   ent.Schema
}

// Fields of the Post.
func (Post) Fields() []ent.Field {
   return []ent.Field{
      field.String("title"),
      field.Text("body"),
      field.Time("created_at").
            Default(time.Now),
   }
}

// Edges of the Post.
func (Post) Edges() []ent.Edge {
   return []ent.Edge{
      edge.From("author", User.Type).
         Unique().
         Ref("posts"),
   }
}
On the Post schema, we defined three fields as well: title, body and created_at. In addition, we defined an edge named author from Post to the User entity. We marked this edge as Unique because in our budding system, each post can have only one author. We used Ref to tell Ent that this edge's back reference is the posts edge on the User.
Ent's power stems from it's code-generation engine. When developing with Ent, whenever we make any change to our application schema, we must invoke Ent's code-gen engine to regenerate our database access code. This is what allows Ent to maintain a type-safe and efficient Go API for us.
Let's see this in action, run:
go generate ./...
Observe that a whole lot of new Go files were created for us:
.
`-- ent
    |-- client.go
    |-- context.go
    |-- ent.go
    |-- enttest
    |   `-- enttest.go
/// .. Truncated for brevity
    |-- user_query.go
    `-- user_update.go

9 directories, 29 files
If you're interested to see what the actual database schema for our application looks like, you can use a useful tool called entviz:
go run -mod=mod ariga.io/entviz ./ent/schema
To view the result, click here.
Once we have our data model defined, let's create the database schema for it.
To install the latest release of Atlas, simply run one of the following commands in your terminal, or check out the Atlas website:
- macOS + Linux
- Homebrew
- Go
- Docker
- Windows
curl -sSf https://atlasgo.sh | sh
brew install ariga/tap/atlas
go install ariga.io/atlas/cmd/atlas@master
docker pull arigaio/atlas
docker run --rm arigaio/atlas --help
If the container needs access to the host network or a local directory, use the --net=host flag and mount the desired
directory:
docker run --rm --net=host \
  -v $(pwd)/migrations:/migrations \
  arigaio/atlas migrate apply
  --url "mysql://root:pass@:3306/test"
Download the latest release and move the atlas binary to a file location on your system PATH.
With Atlas installed, we can create the initial migration script:
atlas migrate diff add_users_posts \
  --dir "file://ent/migrate/migrations" \
  --to "ent://ent/schema" \
  --dev-url "docker://mysql/8/ent"
Observe that two new files were created:
ent/migrate/migrations
|-- 20230226150934_add_users_posts.sql
`-- atlas.sum
The SQL file (the actual file name will vary on your machine depending on the timestamp in which you run atlas migrate diff) contains the SQL DDL statements required to set up the database schema on an empty MySQL database:
-- create "users" table
CREATE TABLE `users` (`id` bigint NOT NULL AUTO_INCREMENT, `name` varchar(255) NOT NULL, `email` varchar(255) NOT NULL, `created_at` timestamp NOT NULL, PRIMARY KEY (`id`), UNIQUE INDEX `email` (`email`)) CHARSET utf8mb4 COLLATE utf8mb4_bin;
-- create "posts" table
CREATE TABLE `posts` (`id` bigint NOT NULL AUTO_INCREMENT, `title` varchar(255) NOT NULL, `body` longtext NOT NULL, `created_at` timestamp NOT NULL, `user_posts` bigint NULL, PRIMARY KEY (`id`), INDEX `posts_users_posts` (`user_posts`), CONSTRAINT `posts_users_posts` FOREIGN KEY (`user_posts`) REFERENCES `users` (`id`) ON UPDATE NO ACTION ON DELETE SET NULL) CHARSET utf8mb4 COLLATE utf8mb4_bin;
To setup our development environment, let's use Docker to run a local mysql container:
docker run --rm --name entdb -d -p 3306:3306 -e MYSQL_DATABASE=ent -e MYSQL_ROOT_PASSWORD=pass mysql:8
Finally, let's run the migration script on our local database:
atlas migrate apply --dir file://ent/migrate/migrations \
  --url mysql://root:pass@localhost:3306/ent
Atlas reports that it successfully created the tables:
Migrating to version 20230220115943 (1 migrations in total):

  -- migrating version 20230220115943
    -> CREATE TABLE `users` (`id` bigint NOT NULL AUTO_INCREMENT, `name` varchar(255) NOT NULL, `email` varchar(255) NOT NULL, `created_at` timestamp NOT NULL, PRIMARY KEY (`id`), UNIQUE INDEX `email` (`email`)) CHARSET utf8mb4 COLLATE utf8mb4_bin;
    -> CREATE TABLE `posts` (`id` bigint NOT NULL AUTO_INCREMENT, `title` varchar(255) NOT NULL, `body` longtext NOT NULL, `created_at` timestamp NOT NULL, `post_author` bigint NULL, PRIMARY KEY (`id`), INDEX `posts_users_author` (`post_author`), CONSTRAINT `posts_users_author` FOREIGN KEY (`post_author`) REFERENCES `users` (`id`) ON UPDATE NO ACTION ON DELETE SET NULL) CHARSET utf8mb4 COLLATE utf8mb4_bin;
  -- ok (55.972329ms)

  -------------------------
  -- 67.18167ms
  -- 1 migrations
  -- 2 sql statements
Step 2: Seeding our database
The code for this step can be found in this commit.
While we are developing our content management system, it would be sad to load a web page for our system and not see content for it. Let's start by seeding data into our database and learn some Ent concepts.
To access our local MySQL database, we need a driver for it, use go get to fetch it:
go get -u github.com/go-sql-driver/mysql
Create a file named main.go and add this basic seeding script.
package main

import (
    "context"
    "flag"
    "fmt"
    "log"

    "github.com/rotemtam/ent-blog-example/ent"

    _ "github.com/go-sql-driver/mysql"
    "github.com/rotemtam/ent-blog-example/ent/user"
)

func main() {
    // Read the connection string to the database from a CLI flag.
    var dsn string
    flag.StringVar(&dsn, "dsn", "", "database DSN")
    flag.Parse()

    // Instantiate the Ent client.
    client, err := ent.Open("mysql", dsn)
    if err != nil {
        log.Fatalf("failed connecting to mysql: %v", err)
    }
    defer client.Close()

    ctx := context.Background()
    // If we don't have any posts yet, seed the database.
    if !client.Post.Query().ExistX(ctx) {
        if err := seed(ctx, client); err != nil {
            log.Fatalf("failed seeding the database: %v", err)
        }
    }
    // ... Continue with server start.
}

func seed(ctx context.Context, client *ent.Client) error {
    // Check if the user "rotemtam" already exists.
    r, err := client.User.Query().
        Where(
            user.Name("rotemtam"),
        ).
        Only(ctx)
    switch {
    // If not, create the user.
    case ent.IsNotFound(err):
        r, err = client.User.Create().
            SetName("rotemtam").
            SetEmail("r@hello.world").
            Save(ctx)
        if err != nil {
            return fmt.Errorf("failed creating user: %v", err)
        }
    case err != nil:
        return fmt.Errorf("failed querying user: %v", err)
    }
    // Finally, create a "Hello, world" blogpost.
    return client.Post.Create().
        SetTitle("Hello, World!").
        SetBody("This is my first post").
        SetAuthor(r).
        Exec(ctx)
}
As you can see, this program first checks if any Post entity exists in the database, if it does not it invokes the seed function. This function uses Ent to retrieve the user named rotemtam from the database and in case it does not exist, tries to create it. Finally, the function creates a blog post with this user as its author.
Run it:
go run main.go -dsn "root:pass@tcp(localhost:3306)/ent?parseTime=true"
Step 3: Creating the home page
The code described in this step can be found in this commit
Let's now create the home page of the blog. This will consist of a few parts:
- The view - this is a Go html/template that renders the actual HTML the user will see.
- The server code - this contains the HTTP request handlers that our users' browsers will communicate with and will render our templates with data they retrieve from the database.
- The router - registers different paths to handlers.
- A unit test - to verify our server behaves correctly.
The view
Go has an excellent templating engine that comes in two flavors: text/template for rendering general purpose text and html/template which had some extra security features to prevent code injection when working with HTML documents. Read more about it here .
Let's create our first template that will be used to display a list of blog posts. Create a new file named templates/list.tmpl:
<html>
<head>
    <title>My Blog</title>
    <link href="https://cdn.jsdelivr.net/npm/bootstrap@5.3.0-alpha1/dist/css/bootstrap.min.css" rel="stylesheet"
          integrity="sha384-GLhlTQ8iRABdZLl6O3oVMWSktQOp6b7In1Zl3/Jr59b6EGGoI1aFkw7cmDA6j6gD" crossorigin="anonymous">

</head>
<body>
<div class="col-lg-8 mx-auto p-4 py-md-5">
    <header class="d-flex align-items-center pb-3 mb-5 border-bottom">
        <a href="/" class="d-flex align-items-center text-dark text-decoration-none">
            <span class="fs-4">Ent Blog Demo</span>
        </a>
    </header>

    <main>
        <div class="row g-5">
            <div class="col-md-12">
                {{- range . }}
                    <h2>{{ .Title }}</h2>
                    <p>
                        {{ .CreatedAt.Format "2006-01-02" }} by {{ .Edges.Author.Name }}
                    </p>
                    <p>
                        {{ .Body }}
                    </p>
                {{- end }}
            </div>

        </div>
    </main>
    <footer class="pt-5 my-5 text-muted border-top">
        <p>
            This is the Ent Blog Demo. It is a simple blog application built with Ent and Go. Get started:
        </p>
        <pre>go get entgo.io/ent</pre>
    </footer>
</div>

<script src="https://cdn.jsdelivr.net/npm/bootstrap@5.3.0-alpha1/dist/js/bootstrap.bundle.min.js"
        integrity="sha384-w76AqPfDkMBDXo30jS1Sgez6pr3x5MlQ1ZAGC+nuZB+EYdgRZgiwxhTBTkF7CXvN"
        crossorigin="anonymous"></script>
</body>
</html>
Here we are using a modified version of the Bootstrap Starter Template as the basis of our UI. Let's highlight the important parts. As you will see below, in our index handler, we will pass this template a slice of Post objects.
Inside the Go-template, whatever we pass to it as data is available as ".", this explains this line, where we use range to iterate over each post:
{{- range . }}
Next, we print the title, creation time and the author name, via the Author edge:
<h2>{{ .Title }}</h2>
<p>
    {{ .CreatedAt.Format "2006-01-02" }} by {{ .Edges.Author.Name }}
</p>
Finally, we print the post body and close the loop.
    <p>
        {{ .Body }}
    </p>
{{- end }}
After defining the template, we need to make it available to our program. We embed this template into our binary using the embed package (docs):
var (
   //go:embed templates/*
   resources embed.FS
   tmpl      = template.Must(template.ParseFS(resources, "templates/*"))
)
Server code
We continue by defining a type named server and a constructor for it, newServer. This struct will have receiver methods for each HTTP handler we create and binds the Ent client we created at init to the server code.
type server struct {
    client *ent.Client
}

func newServer(client *ent.Client) *server {
    return &server{client: client}
}
Next, let's define the handler for our blog home page. This page should contain a list of all available blog posts:
// index serves the blog home page
func (s *server) index(w http.ResponseWriter, r *http.Request) {
    posts, err := s.client.Post.
        Query().
        WithAuthor().
        All(r.Context())
    if err != nil {
        http.Error(w, err.Error(), http.StatusInternalServerError)
        return
    }
    if err := tmpl.Execute(w, posts); err != nil {
        http.Error(w, err.Error(), http.StatusInternalServerError)
    }
}
Let's zoom in on the Ent code here that is used to retrieve the posts from the database:
// s.client.Post contains methods for interacting with Post entities
s.client.Post.
    // Begin a query.
    Query().
    // Retrieve the entities using the `Author` edge. (a `User` instance)
    WithAuthor().
    // Run the query against the database using the request context.
    All(r.Context())
The router
To manage the routes for our application, let's use go-chi, a popular routing library for Go.
go get -u github.com/go-chi/chi/v5
We define the newRouter function that sets up our router:
// newRouter creates a new router with the blog handlers mounted.
func newRouter(srv *server) chi.Router {
    r := chi.NewRouter()
    r.Use(middleware.Logger)
    r.Use(middleware.Recoverer)
    r.Get("/", srv.index)
    return r
}
In this function, we first instantiate a new chi.Router, then register two middlewares:
middleware.Loggeris a basic access logger that prints out some information on every request our server handles.middleware.Recovererrecovers from when our handlers panic, preventing a case where our entire server will crash because of an application error.
Finally, we register the index function of the server struct to handle GET requests to the / path of our server.
A unit test
Before wiring everything together, let's write a simple unit test to check that our code works as expected.
To simplify our tests we will install the SQLite driver for Go which allows us to use an in-memory database:
go get -u github.com/mattn/go-sqlite3
Next, we install testify, a utility library that is commonly used for writing assertions in tests.
go get github.com/stretchr/testify
With these dependencies installed, create a new file named main_test.go:
package main

import (
    "context"
    "io"
    "net/http"
    "net/http/httptest"
    "testing"

    _ "github.com/mattn/go-sqlite3"
    "github.com/rotemtam/ent-blog-example/ent/enttest"
    "github.com/stretchr/testify/require"
)

func TestIndex(t *testing.T) {
    // Initialize an Ent client that uses an in memory SQLite db.
    client := enttest.Open(t, "sqlite3", "file:ent?mode=memory&cache=shared&_fk=1")
    defer client.Close()

    // seed the database with our "Hello, world" post and user.
    err := seed(context.Background(), client)
    require.NoError(t, err)

    // Initialize a server and router.
    srv := newServer(client)
    r := newRouter(srv)

    // Create a test server using the `httptest` package.
    ts := httptest.NewServer(r)
    defer ts.Close()

    // Make a GET request to the server root path.
    resp, err := ts.Client().Get(ts.URL)

    // Assert we get a 200 OK status code.
    require.NoError(t, err)
    require.Equal(t, http.StatusOK, resp.StatusCode)

    // Read the response body and assert it contains "Hello, world!"
    body, err := io.ReadAll(resp.Body)
    require.NoError(t, err)
    require.Contains(t, string(body), "Hello, World!")
}
Run the test to verify our server works correctly:
go test ./...
Observe our test passes:
ok      github.com/rotemtam/ent-blog-example    0.719s
?       github.com/rotemtam/ent-blog-example/ent        [no test files]
?       github.com/rotemtam/ent-blog-example/ent/enttest        [no test files]
?       github.com/rotemtam/ent-blog-example/ent/hook   [no test files]
?       github.com/rotemtam/ent-blog-example/ent/migrate        [no test files]
?       github.com/rotemtam/ent-blog-example/ent/post   [no test files]
?       github.com/rotemtam/ent-blog-example/ent/predicate      [no test files]
?       github.com/rotemtam/ent-blog-example/ent/runtime        [no test files]
?       github.com/rotemtam/ent-blog-example/ent/schema [no test files]
?       github.com/rotemtam/ent-blog-example/ent/user   [no test files]
Putting everything together
Finally, let's update our main function to put everything together:
func main() {
   // Read the connection string to the database from a CLI flag.
   var dsn string
   flag.StringVar(&dsn, "dsn", "", "database DSN")
   flag.Parse()

   // Instantiate the Ent client.
   client, err := ent.Open("mysql", dsn)
   if err != nil {
      log.Fatalf("failed connecting to mysql: %v", err)
   }
   defer client.Close()

   ctx := context.Background()
   // If we don't have any posts yet, seed the database.
   if !client.Post.Query().ExistX(ctx) {
      if err := seed(ctx, client); err != nil {
         log.Fatalf("failed seeding the database: %v", err)
      }
   }
   srv := newServer(client)
   r := newRouter(srv)
   log.Fatal(http.ListenAndServe(":8080", r))
}
We can now run our application and stand amazed at our achievement: a working blog front page!
go run main.go -dsn "root:pass@tcp(localhost:3306)/test?parseTime=true"

Step 4: Adding content
You can follow the changes in this step in this commit.
No content management system would be complete without the ability, well, to manage content. Let's demonstrate how we can add support for publishing new posts on our blog.
Let's start by creating the backend handler:
// add creates a new blog post.
func (s *server) add(w http.ResponseWriter, r *http.Request) {
    author, err := s.client.User.Query().Only(r.Context())
    if err != nil {
        http.Error(w, err.Error(), http.StatusInternalServerError)
        return
    }
    if err := s.client.Post.Create().
        SetTitle(r.FormValue("title")).
        SetBody(r.FormValue("body")).
        SetAuthor(author).
        Exec(r.Context()); err != nil {
        http.Error(w, err.Error(), http.StatusInternalServerError)
    }
    http.Redirect(w, r, "/", http.StatusFound)
}
As you can see, the handler currently loads the only user from the users table (since we have yet to create a user management system or login capabilities). Only will fail unless exactly one result is retrieved from the database.
Next, our handler creates a new post, by setting the title and body fields to values retrieved from r.FormValue. This is where Go stores all of the form input passed to an HTTP request.
After creating the handler, we should wire it to our router:
// newRouter creates a new router with the blog handlers mounted.
func newRouter(srv *server) chi.Router {
    r := chi.NewRouter()
    r.Use(middleware.Logger)
    r.Use(middleware.Recoverer)
    r.Get("/", srv.index)
    r.Post("/add", srv.add)
    return r
}
Next, we can add an HTML <form> component that will be used by our user to write their content:
<div class="col-md-12">
    <hr/>
    <h2>Create a new post</h2>
    <form action="/add" method="post">
        <div class="mb-3">
            <label for="title" class="form-label">Title</label>
            <input name="title" type="text" class="form-control" id="title" placeholder="Once upon a time..">
        </div>
        <div class="mb-3">
            <label for="body" class="form-label">Body</label>
            <textarea name="body" class="form-control" id="body" rows="8"></textarea>
        </div>
        <div class="mb-3">
            <button type="submit" class="btn btn-primary mb-3">Post</button>
        </div>
    </form>
</div>
Also, let's add a nice touch, where we display the blog posts from newest to oldest. To do this, modify the index handler to order the posts in a descending order using the created_at column:
posts, err := s.client.Post.
    Query().
    WithAuthor().
    Order(ent.Desc(post.FieldCreatedAt)).
    All(ctx)
Finally, let's add another unit test that verifies the add post flow works as expected:
func TestAdd(t *testing.T) {
    client := enttest.Open(t, "sqlite3", "file:ent?mode=memory&cache=shared&_fk=1")
    defer client.Close()
    err := seed(context.Background(), client)
    require.NoError(t, err)

    srv := newServer(client)
    r := newRouter(srv)

    ts := httptest.NewServer(r)
    defer ts.Close()

    // Post the form.
    resp, err := ts.Client().PostForm(ts.URL+"/add", map[string][]string{
        "title": {"Testing, one, two."},
        "body":  {"This is a test"},
    })
    require.NoError(t, err)
    // We should be redirected to the index page and receive 200 OK.
    require.Equal(t, http.StatusOK, resp.StatusCode)

    body, err := io.ReadAll(resp.Body)
    require.NoError(t, err)

    // The home page should contain our new post.
    require.Contains(t, string(body), "This is a test")
}
Let's run the test:
go test ./...
And everything works!
ok      github.com/rotemtam/ent-blog-example    0.493s
?       github.com/rotemtam/ent-blog-example/ent        [no test files]
?       github.com/rotemtam/ent-blog-example/ent/enttest        [no test files]
?       github.com/rotemtam/ent-blog-example/ent/hook   [no test files]
?       github.com/rotemtam/ent-blog-example/ent/migrate        [no test files]
?       github.com/rotemtam/ent-blog-example/ent/post   [no test files]
?       github.com/rotemtam/ent-blog-example/ent/predicate      [no test files]
?       github.com/rotemtam/ent-blog-example/ent/runtime        [no test files]
?       github.com/rotemtam/ent-blog-example/ent/schema [no test files]
?       github.com/rotemtam/ent-blog-example/ent/user   [no test files]
A passing unit test is great, but let's verify our changes visually:
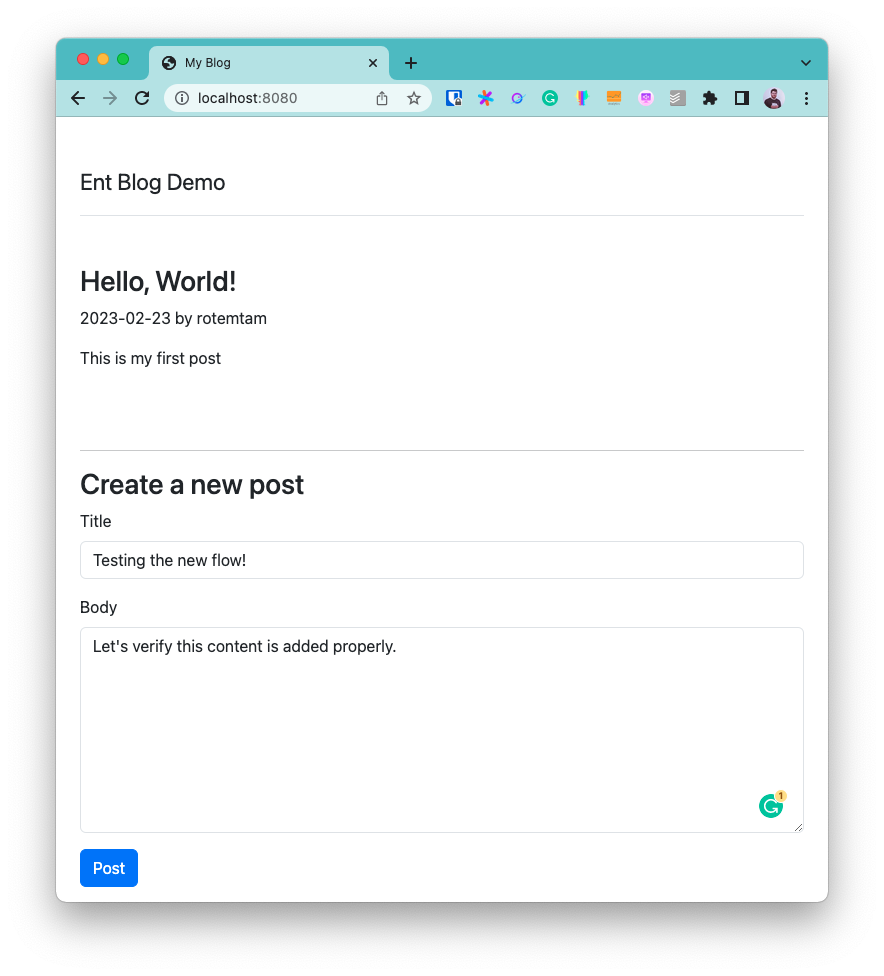
Our form appears - great! After submitting it:

Our new post is displayed. Well done!
Wrapping up
In this post we demonstrated how to build a simple web application with Ent and Go. Our app is definitely bare but it deals with many of the bases that you will need to cover when building an application: defining your data model, managing your database schema, writing server code, defining routes and building a UI.
As things go with introductory content, we only touched the tip of the iceberg of what you can do with Ent, but I hope you got a taste for some of its core features.
- Subscribe to our Newsletter
- Follow us on Twitter
- Join us on #ent on the Gophers Slack
- Join us on the Ent Discord Server